The decision to rent the School of Artisan Food was made, a recipe was researched, whilst attending a course there, I was able to work out what equipment we’d need and finally our dates rolled around. Rose purchased containers, filled them with milk and sent them off with a refrigerated courier. I drove myself off to the School of Artisan Food and got ready to receive milk.
I spent a day sanitising equipment and writing up a HACCP plan for our trial production and the following day was in bright and early for the milk to arrive.
Taleggio is an interesting make from my point of view, in that it uses thermophilic bacteria as a starter culture and yet doesn’t use the temperatures at which thermophilic bacteria tend to work best. Like all washed rinds, the curd doesn’t want to acidify very much and it wants to retain a calcium rich, pliant structure. The thermophilic bacteria therefore are used precisely because they will start working but as the temperature of the make cools off when the cheeses are in their moulds, they will stop going, the acidity will level out and won’t develop further. This in theory and coupled with curd washing, should mean that the cheeses remain pliant with their moisture locked within the curd structure and soften when ripe to a gloriously oozing texture. That is the theory anyway.
 |
| Taleggio photo courtesy of the thefiftybest.com |
Within this, of course, there are many parameters to play with. So many, in fact, that I wish we were in full production right now in some ways so I could be happily making cheese day after day, tinkering with a whole multitude of variables. Would a degree or 2 more or less in terms of temperature affect the rennet set and the texture as the cheese matures? How would the flavour and acidity be affected if I remove a bit less whey at curd washing? What if I add in more starter cultures at stirring? What if I stir for longer? That’s not even getting started on how much starter we need to use to work with our milk and how much rennet will get me a 15 minute flocculation and 45 minute hardening time (which, I believe, is what I’m aiming for).
First challenge and challenge not yet overcome at that, is the quantity of starter. There are no hard and fast rules for this of course because the amount of starter you use is entirely related to the numbers of lactic acid bacteria in your milk. Thinking back to my Holker Farm days and remembering the drainage battles we had balancing acidity and calcium, I figured that if I wanted to have a slow acid development, even though I was using thermophilic bacteria this time rather than mesophilic ones, I should be using pretty small quantities of starter. In retrospect, I’m not sure that was the case, but you live and learn. I remembered that when I left Holker, we were using tiny quantities of bulk starter, having been advised to drop to around 0.025% and before that had been using still pretty tiny quantities at 0.05%. I decided to start at the higher of these values, having made up a yoghurt culture in skimmed milk the night before and incubated it overnight. Yoghurt cultures, for those who didn’t realise, are thermophilic bacteria.
Now, at this stage, the benefit of recording values of acidity began to hit home. In all my time at Holker, we never recorded a pH. The pH meter had broken before I arrived and they are very expensive bits of kit to replace. We took titratable acidity of course but the TA of our starter cultures which I took every so often, are hard to correlate with that of this yoghurt because of the buffering factor. Our starters at Holker were made up in sheeps milk, which is high in protein – it can be up to 3 times that of cows milk. My yoghurt cultures were made up in UHT skimmed cows milk. As you all no doubt remember from the pH and Titratable acidity post last autumn, protein captures Hydroxl ions (OH-) when you add the alkaline solution looking for a pink colour produced by its reaction with the indicator, phenolphthalein. This distorts the correlation between acid and pH because it is non-uniform. The more protein the milk has, the more Hydroxyl ions it can capture and the more Sodium Hydroxide needs to be added before a reaction with the indicator will register. In other words the TA value will be higher in sheeps milk than in cows milk just down to the protein. In fact, at Holker when we began making cows milk and sheeps milk cheese side by side, we noticed a huge difference when recording the TA at 24hours (or thereabouts) between the two. Our sheeps milk St James regularly recorded 80-90 ’D while the cows milk Brother Davids struggled to reach 40’D. You would think that the majority of the protein in the sheeps milk had been locked up in the curd by then but just as the milk is higher in protein, so is the whey and so the titratable acidities ended up being quite dramatically different.
Anyway, returning to the matter in hand and hope I didn’t lose too many non techno cheese geeks along the way. There was no point, to my mind, trying to correlate vaguely remembered TA values of starter culture with a yoghurt I had just made as I didn’t have any of those values recorded for reference. So I took a pH reading of the starter and was conscious it was more acidic than my notes from Ivan Larcher’s course suggested was ideal (pH 5 – to make sure you catch the bacteria while they are multiplying happily and before the lactic acid they have produced can denature them and kill them off), but otherwise didn’t have much to relate it to.
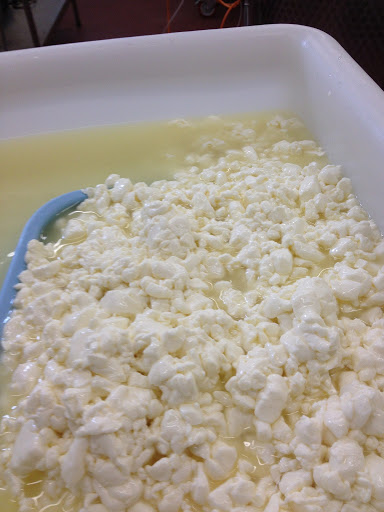
On the first trial, 0.05% in quantity was added to 50 litres milk, the milk was heated to 34’C, rennet added at the appropriate pH change and I filled my pot of water to look out for flocculation times. The flocculation happened right on time, the hardening more or less followed the pattern it was supposed to. I pre-cut, then cut to hazelnut size (more or less – it’s a bit hard to use a cutting harp designed for a big vat in a 50 litre tub), let if settle, took off the 25% whey, added back the appropriate quantity of water at 32C, added some starter back in for flavour and stirred. The recipe was one I’d found online and frankly has already been adapted. At the time, I queried curd washing with Ivan Larcher and he replied
‘Good luck settling the pH at 5.2 without it.’
Later on, I asked for clarification on quantities and adjusting those parameters only to be told that it’s an industrial technique and he didn’t recommend me doing it. I have therefore stopped.
However I was doing so on this trial make, and at every stage, I was recording pH on the spreadsheet Ivan had emailed me after our Blue Cheese course so that it would track the pH curve. Unfortunately my pH curve didn’t curve. It was more of a wobbly straight line. Short of leaving the whole thing for 24 hours to acidify on its own, there wasn’t much I could do but proceed, pre-draining the curd on a mat and then filling the moulds with the drained curd pieces and turning, turning, turning throughout the afternoon.

 |
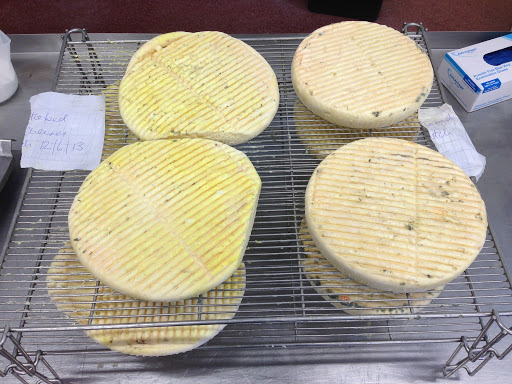
| All looking quite convincing so far – unfortunately it’s all in the maturation. |
They looked pretty convincingly like cheeses. They were draining. But who knows what was going on below the surface without much acidification. The problem is, all sorts of other bacteria could be enjoying the quantities of lactose and developing to undesirable results. Unfortunately despite doubling the starter cultures the following day, the same acidification pattern followed. Evidently at Holker Farm the starter culture had very minimal effect and acidification was largely governed by the lactic acid bacteria naturally present in the sheep and cows milk. Further unfortunately, I already knew from a lactofermentation we had done a week or so earlier when Rose drove up (bringing a bottle of milk with her) to SAF to meet Ivan and me after one of the days of the course had finished, that we didn’t have a lot of strong lactic acid bacteria in our milk at the moment and that other things tended to become dominant. To say I was nervous of the test results we would get from milk and curd samples would be an understatement.
I left SAF; the samples headed to the lab; we waited for the results. As I had feared, without enough lactic acid bacteria from the starter or naturally present in the milk itself, enteros and pseudomonas had had a field day. Staph. aureus hadn’t done so badly either.
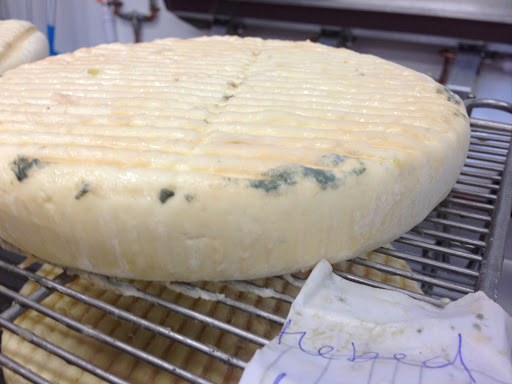 |
| Not quite what I was hoping for but still looking relatively like cheeses |
After a couple of weeks, I drove to SAF to collect the unfortunate cheeses. I did not have high hopes to be honest, particularly as one of them had pancaked overnight and collapsed – a bit of a surprise for me and also for Lee Anna.
However, I had known, that I had more cheese than I was expecting, which I suspected meant they were too moist. This raises the likelihood of crazy things happening during maturation. What I didn’t know however until I began to think and mull it over was that those rather too healthy pseudomonas might also have played a part in this too. Pseudomonas, as I had discovered thanks to the very knowledgeable Paul Thomas, are caseolytic (they eat casein). Could that mean that they might increase the speed and amount of protein breakdown in our cheeses? One quick email and a reply later and yes, by no means the only factor but, if there were large numbers of pseudomonas, then there was much more chance of pancaked gooey cheeses that fall apart.
All in all, I wasn’t sure what I would find at SAF but although one batch had fallen to pieces, the other did seem to be holding some shape and smelled convincingly washed rind. Not the best behaved of washed rind, I’ll admit, but I’ve smelled worse in my time. We tasted one of them and to my surprise there wasn’t a strongly bitter flavour that I was expecting due to the pseudomonas, in fact the predominant flavours were beery, yeasty and fruity with a hint of meaty and savoury in the background and perhaps just a touch of the bitterness on the rind but certainly not overpowering.
Now let’s be clear, it’s not the flavour profile I want but then again, the recipe didn’t work, so for it to have turned out to be not only edible but while a bit raucous, actually not too bad, was a definite bonus. That said, a valuable lesson was learned for Cheese Trial no 2: use a hell of a lot more starter!
Related articles
- Washed Rinds Blowing through my Mind (thecheesemakingyears.wordpress.com)
- The cheesemaking day (cotswoldcheesemaker.wordpress.com)
- http://muchtodoaboutcheese.com/2014/01/14/two-for-taleggio-part-i/

5 thoughts on “The Taleggio Experiment”