It’s getting real!


We have windows and doors in!

Lots of bits and pieces have been happening recently.  Building work has slowed down a bit since the heady days when the walls went up.  The thing holding us up is that the concrete laid as foundations for our floor has cracks and although it’s quite likely that these are just cracks caused by the concrete drying, we need to be sure they aren’t a sign of something more serious like subsidence.  So we wait for someone with structural engineering knowledge to assess them and sign them off.

Once that is done we can put in the framework for the first floor and with that in place, we can start to put in the panelling that forms the interior walls.  In other words, we’ll have rooms.

Meanwhile I have been working on paperwork still – the end is in sight finally.  Actually, I hope it is, every time I say that to myself, I remember some other record sheet or schedule that I’ll need and it goes on the job list.  We’ve ordered and paid for our industrial dishwasher, the final payment on the equipment from Avedemil has been made and 4 pallets including vat, racks, wash tubs, multimoulds and stainless steel tables should soon be on their way to us.  The pipework to divert our milk out of the main milkline before it can be cooled or can get into the bulk tank is on order and we’re pushing for it to be in by 11th August.

Why 11th August did you ask?  Well because officially I have a date to move south.  7th August.  And come what may, I will be on the payroll as of the 11th as with Rose on holiday in Greece, I’ll be managing the build and using our warm milk, I’ll be making trial cheeses in the kitchen of my house and then maturing them in a wine fridge.  It will be good to get my hands on some curds again – just have to remember to order a few key bits of gear: starters, a tub to make cheese in, an electric blanket and indeed the wine fridge.

The trial cheesemaking came about on a visit from Jason Hinds, David Lockwood and Bronwen Percival from Neal’s Yard Dairy.  They came for an informal morning chat to look at progress, talk about the quality of cheese they are looking for and its implications for milk quality, sales and advice on our financials.  All three of them felt that as soon as the milk was in place, making some kitchen trials would be well worth the exercise in understanding where the milk quality is at this year (it’s bound to be rather different to February when we last did any testing and again to last summer when I was making trial cheeses at SAF) as well as hopefully having something to taste and start to comment on. We’re going to go down to London for a big cheese tasting with Bronwen at the end of August which will be a useful calibration exercise.  In theory I know what their cheeses are like but it’s a few years now since I’ve been tasting them regularly and I’ll need a refresher to check out our washed rind competition.  For Rose, seeing how Bronwen tastes, assesses flavour and quality and understanding what she is looking for will be invaluable.  It’s her job to look after sales when we’re up and running so a bit of calibration with one of our customers (we hope) can only be a good thing.

So it’s a mixed bag as I’m sure will be familiar to anyone who’s been involved in building work: some progress, some delays and on not too many occasions the odd step backwards.  Overall though we’re getting there and with a confirmed date in the diary for me to start work, it’s getting real.

All you ever wanted to know about Blue Cheese but were afraid to ask?

Or perhaps more than you realised there was to know about Blue Cheese and had no idea of how much to ask.

Back in April this year, I got a call from Lee Anna Rennie at the School of Artisan Food.
‘Hello!’ came the cheery greeting over the phone, ‘I think I have something that might interest you…’
She proceded to explain that the School and Ivan Larcherwere extending his Professional Lactic and Blue Cheese courses and that he had suggested that she give me a call since we were planning to make a blue cheese.  The course was going to be epic, she enthused, basic cheesemaking knowhow, lots of practical and a month’s maturation time so we could finish off by troubleshooting and looking at how to mature blue cheeses.
This happened to fall into my lap at a very opportune moment.  Before Christmas I had been in touch with Jasper Hill Farms in Vermont in the hopes of going on one of their internship programmesConstant Bliss is my very favourite Chaource style cheese (better than the original – sorry the French nation) and I also wanted to practice making blues as well in the form of their Bayley Hazen Blue.  I emailed Mateo who I had known from the NYD days and who I’d visited many years ago with Randolph Hodgson way back before their ambitious cellars had been built or indeed their current micro lab.  Mateo put me in touch with Emily in their HR department and we exchanged emails and talked about what sort of internship would suit.  It looked good for the prospect of a couple of months making cheese, maturing cheese and a little bit on quality systems and the farm for good measure.  Unfortunately then their audit from the government intervened.  According to Andy Kehler who I had a brief chance to chat to in Italy during Cheese, their whole system had to be turned upside down at huge expense and significant amounts of work had to be done and backdated which must have been hugely frustrating for them as it seemed like it was an amazing system in the first place.  An email from Emily let me know that they had managed to sort out a system for interns who wanted to apply from within the US but were stuck for people coming in from another country and she couldn’t really guarantee when they might be able to come up with something.  This had been a concern for me because although I had already made lactic cheese and felt reasonably confident going into lactic cheesemaking, I hadn’t made a blue cheese before and wanted to be better prepared.  Jasper Hill had been going to be my opportunity to get some practice in and since it fell through, I’d been racking my brains trying to think of another alternative.  Here it was.
The course fell into three parts: introduction in April, practical in May, troubleshooting in early June.
We all showed up in April, met in the kitchen at the School of Artisan food, poured ourselves a coffee and introduced ourselves.  My fellow students included: Rich Hodgsonfrom the Isle of Wight Cheese Company, Roger Longman from White Lake Cheeses, Afke Baukje Haanstra who was over on an almost last minute impulse from Holland, Fergus Ledingham from Thornby Moor Dairy and finally Gareth Derrick, retiring from the armed forces and about to begin a life of cheese (he has since started up Erme River Dairy).
Our first, three day, section covered the basics, but when I say basics, that gives the idea that it’s quite simple.  There was so much more information than that.  I’d heard Ivan teach about milk before when I did a cheesemaking workshop at Will and Caroline Atkinson’s farm and so all the topics weren’t entirely new to me, but I still left at the end of the theory day with a slight headache.  We covered the production of milk including how the udder is structured, how a milkline works and what happens in the udder during lactation;  a basic milk chemistry including a really useful conclusions that you can draw by taking pH and titratable acidity readings on your milk over time that I’ve described on a previous post , milk’s chemical composition breaking down its fats and protein components including handy tips for milk storage so as to preserve the fats and the structure of the casein micelle, lactose, milk’s mineral content (including calcium) and enzymes.
We spent quite some time on different starter cultures both those that develop lactic acidity and the yeasts and ripening cultures that are also added to the milk, or naturally present in raw milk.  Then covered various different ways of coagulating milk from the lactic set, animal rennet, vegetable rennets, thistle extract.
However, to say this makes it sound like it’s a very dry and theoretical course.  It isn’t.
‘I can only teach cheese,’ Ivan said when we entered the School of Artisan Food teaching dairy, ‘By making cheese.  So we’re going to make cheese.’
As a demonstration we made a fairly industrial recipe Camberzola / Blue Brie style to show the industrial modern soft cheese techniques and a hard cheese technique blue cheese like Bleu de Gex.  I have to be honest, the Blue Brie technique didn’t engage me that much because even though I would like to make a Gorgonzola, my plan has always been to make something a little more flavourful.  The trick with a cheese like that however is how to maintain the white rind with the blue interior.  It’s a skill, although to be honest not one that I’m interested in perfecting because I want a nice washed rind style outer on my cheese.  The Bleu de Gex was interesting however and both recipes taught us a few fundamentals to prepare us for next time.  Firstly, adding yeasts in our starter cultures to create gas holes in the paste so the cheese has an open texture through which the blue can travel.  Secondly the level of acidity that you want to reach for a blue cheese.  This obviously alters from recipe to recipe, however Penicillium roqueforti can tolerate acidity.  It’s one of the few moulds that can grow in very acid conditions.  If you think about it, the only mould you get growing on a lemon is blue mould.  So to advantage this mould rather than something else, you cultivate a certain amount of acidity.
Cheeses made and salted, lessons learned, we departed and returned again a month later for the practical.
This time, although we did more theory of course,  we made 4 different contrasting types of cheese: a Fourme d’Ambert (with Guernsey milk, thanks to Roger), a Gorgonzola Cremoso style (with added cream which allowed us to learn to use the Pearson square technique which can be used for calculating how much cream to add or how much skimmed milk to add if you want to standardise to a certain fat percentage), a goats milk Stilton style (or basically a slow acid development milled blue cheese based around lactic technology which by the way is what Stilton is – but also so is Bleu de Termignon, Blu del Moncenisio (in its really traditional form) and to some extent also Castelmagno) that last one was also thanks to Roger for supplying the goats milk.
Cheeses made, we had to decide on the recipe we would use for our next cheese.  To this end we learned how to re-create a recipe from the end point or ‘reverse engineering’ as it was not entirely romantically called.  Basically you start with the sort of cheese you want – soft or hard and you move back.  If it’s a hard cheese, you need a quite soft set that therefore has a long flocculation time and a relatively short hardening time.  If it’s a soft cheese, you need quite a firm set that has a short flocculation time with a long hardening time.  This is a bit counter intuitive I realise but the set locks the moisture in and a hard cheese wants to lose its moisture while retaining its milk solids in the form of protein and fats.  For blue cheeses, you need to consider how your blueing will present in the final cheese.  If you want marbling then the cheese needs to be milled.  If you want pockets of blue then you add yeasts to the milk with the lactic starters and create an open texture but don’t mill it.
We made a soft blue cheese (well we only had a month to assess it in and for it to have any semblance of how it might develop we couldn’t really choose a hard cheese – in a way more’s the pity) and called it Blue Wednesday.  Ivan has worked with Ruaridh Stone on his recipe for Blue Monday (when he worked with Alex James) and Blue Murder (when they parted ways – hmmm amicable break up do you think??).
Our final cheese finished, we set off again for our final break and then returned a month later for a final couple of days to taste, assess and finish off.  Along our way, despite making lots of cheese, we had also covered the business of what moulds to choose.  Did you know there are hundreds of varieties of Penicillium roqueforti a cheesemaker can choose?  The best varieties are sold in France which is unfortunate for the English cheesemaker because, for starters if you don’t speak French you’re in a bit of trouble, but also you have to get it delivered over from France which is a bit less reliable as far as courier companies go.  I’ve worked on the other side of couriering, trying to send things from England to France, and I know it’s fraught with difficulties and delays and lost parcels.  However a lot of the problems I’ve encountered were sending things to addresses in Europe which may or may not have been correct (you never realise how little the average person knows about their own postal address until you have to run it through a courier’s consignment system – myself included).  If you double check your English address (and you can do this on Royal Mail’s website) then there’s no reason that your parcel should get lost.  So just the general logistics difficulties then!  Ivan, as you would expect, gave us some good leads for interesting moulds, cultures and starters.  The key, however, should you be interested is that liquid mould cultures work best.  Also that Pencillium roqueforti may not necessarily be your best bet in blue cheese making.  Some Gorgonzola makers, rather than using roqueforti which can be too strong and break down the proteins and fats too quickly, use Penicillium glaucum which is a blue mould that is also used in goats cheeses, particularly cheeses like Valencay.  In fact, Mons Cheesemongerssell a cheese called Persille de Beaujolais which is a Fourme d’Ambert recipe but made using Penicillium glaucum they have procured from some friends in Italy who make Gorgonzola.  The technology is spreading.  It gives lighter, less alcoholic and more mushroomy flavours and, having sold the odd piece or two, I can tell you, it goes down well with the nervous blue cheese buyer as well as actually being rather damn lovely too.
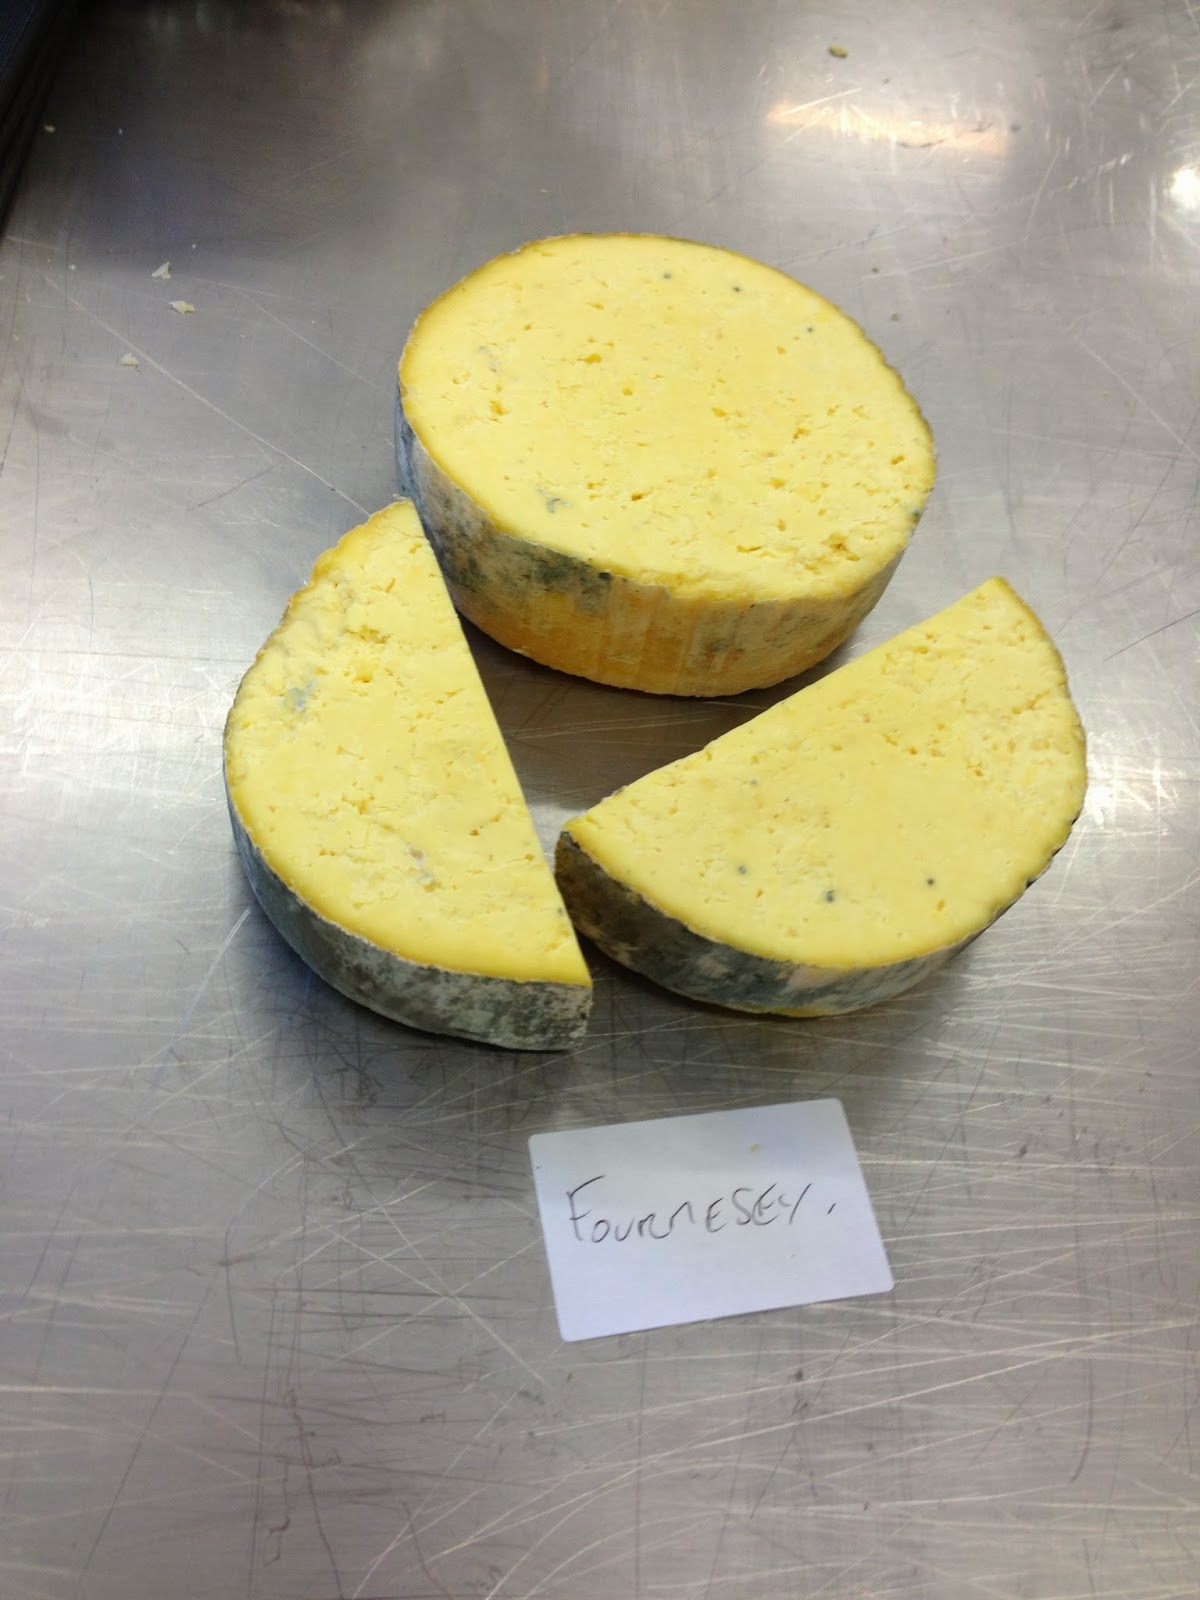
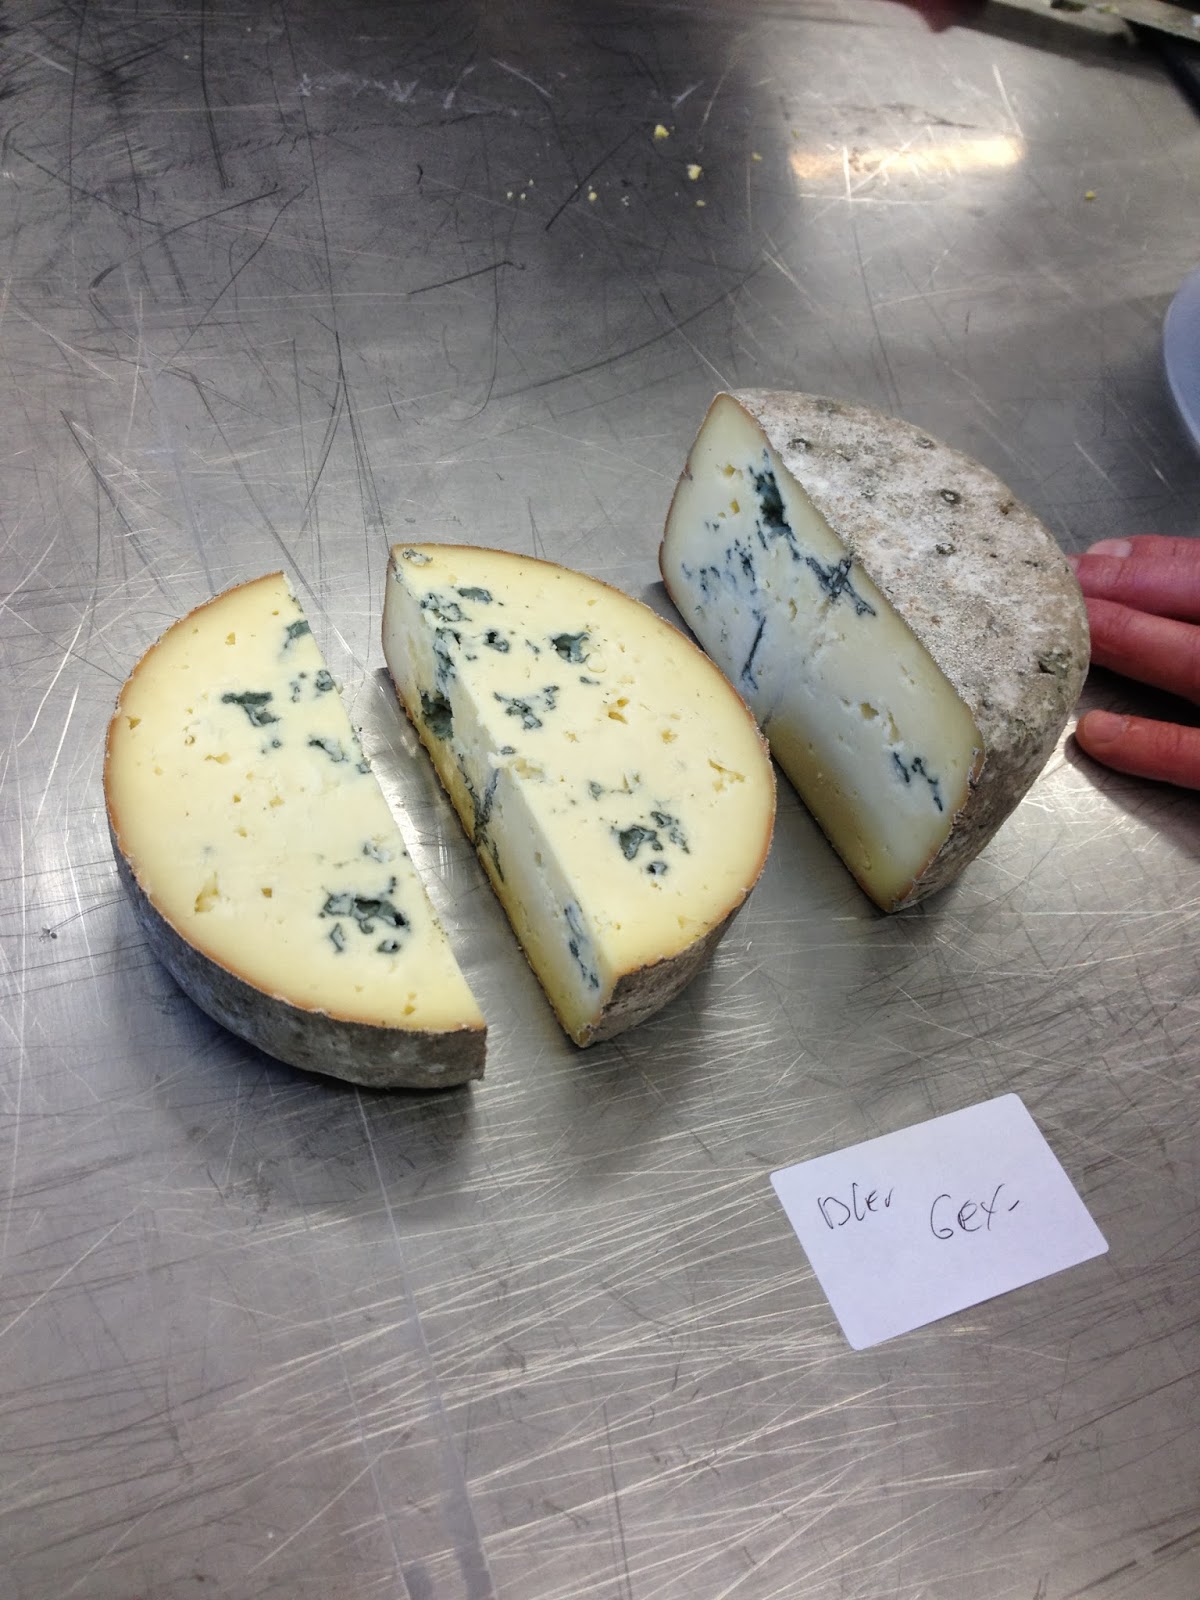
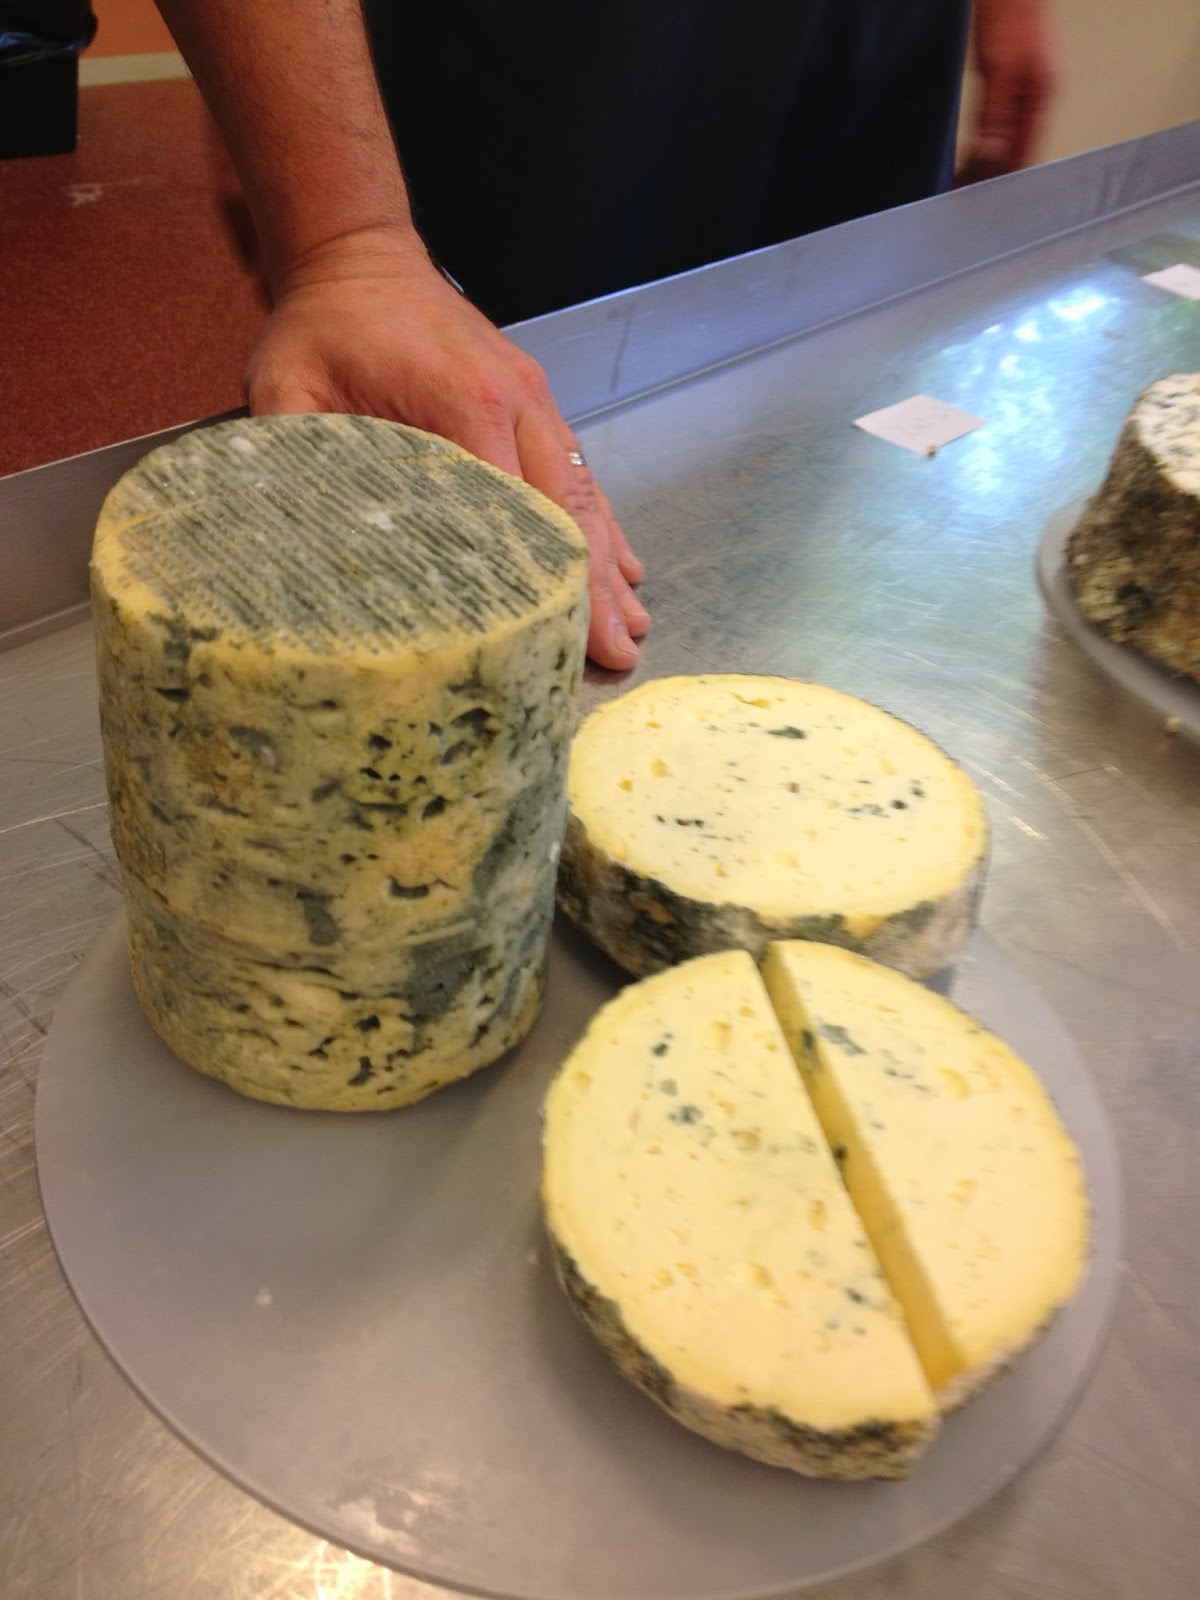
So June beckoned and we tasted the cheeses we’d made last month.  We cut the cheeses open and tasted them.  The Bleu de Gex from our first visit was generally considered really rather good.  I took some home and we ate them at home for quite some time.  I can concur, it was really good.  The Blue Bries had unfortunately suffered in maturation and dried out.  They became bullets.  The Gorgonzola had too much cream added (we used 7% but you would usually use 6% or less) and this inhibited the blue.  It was also undersalted and had the danger of going soapy.  The Fourme d’Ambert with Guernsey milk seemed good so far.  The goats milk Stilton or rather Stichelton as we never pasteurised it (Ivan doesn’t teach courses with pasteurised milk) were over-acidified (which we had known at the time) and the wrong blue had been used (we also knew this at the time too – it was a spot the mistake test).  For goats milk a less lipolytic blue should have been used.  The School of Artisan Food only had Penicillium roqueforti and at that a fairly standard strain.  Ideally we would perhaps have used Penicillium glaucum or at least a less lipolytic strain of roqueforti.
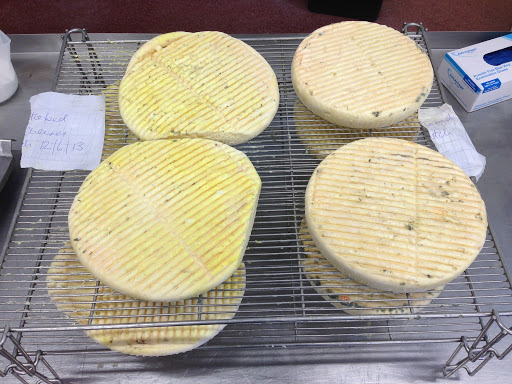
The Guernsey Fourme
Our Bleu de Gex – not even blueing I think you could say but it tasted good.
Gorgonzola with added cream – enough to inhibit the blueing perhaps??
Blue Wednesday!
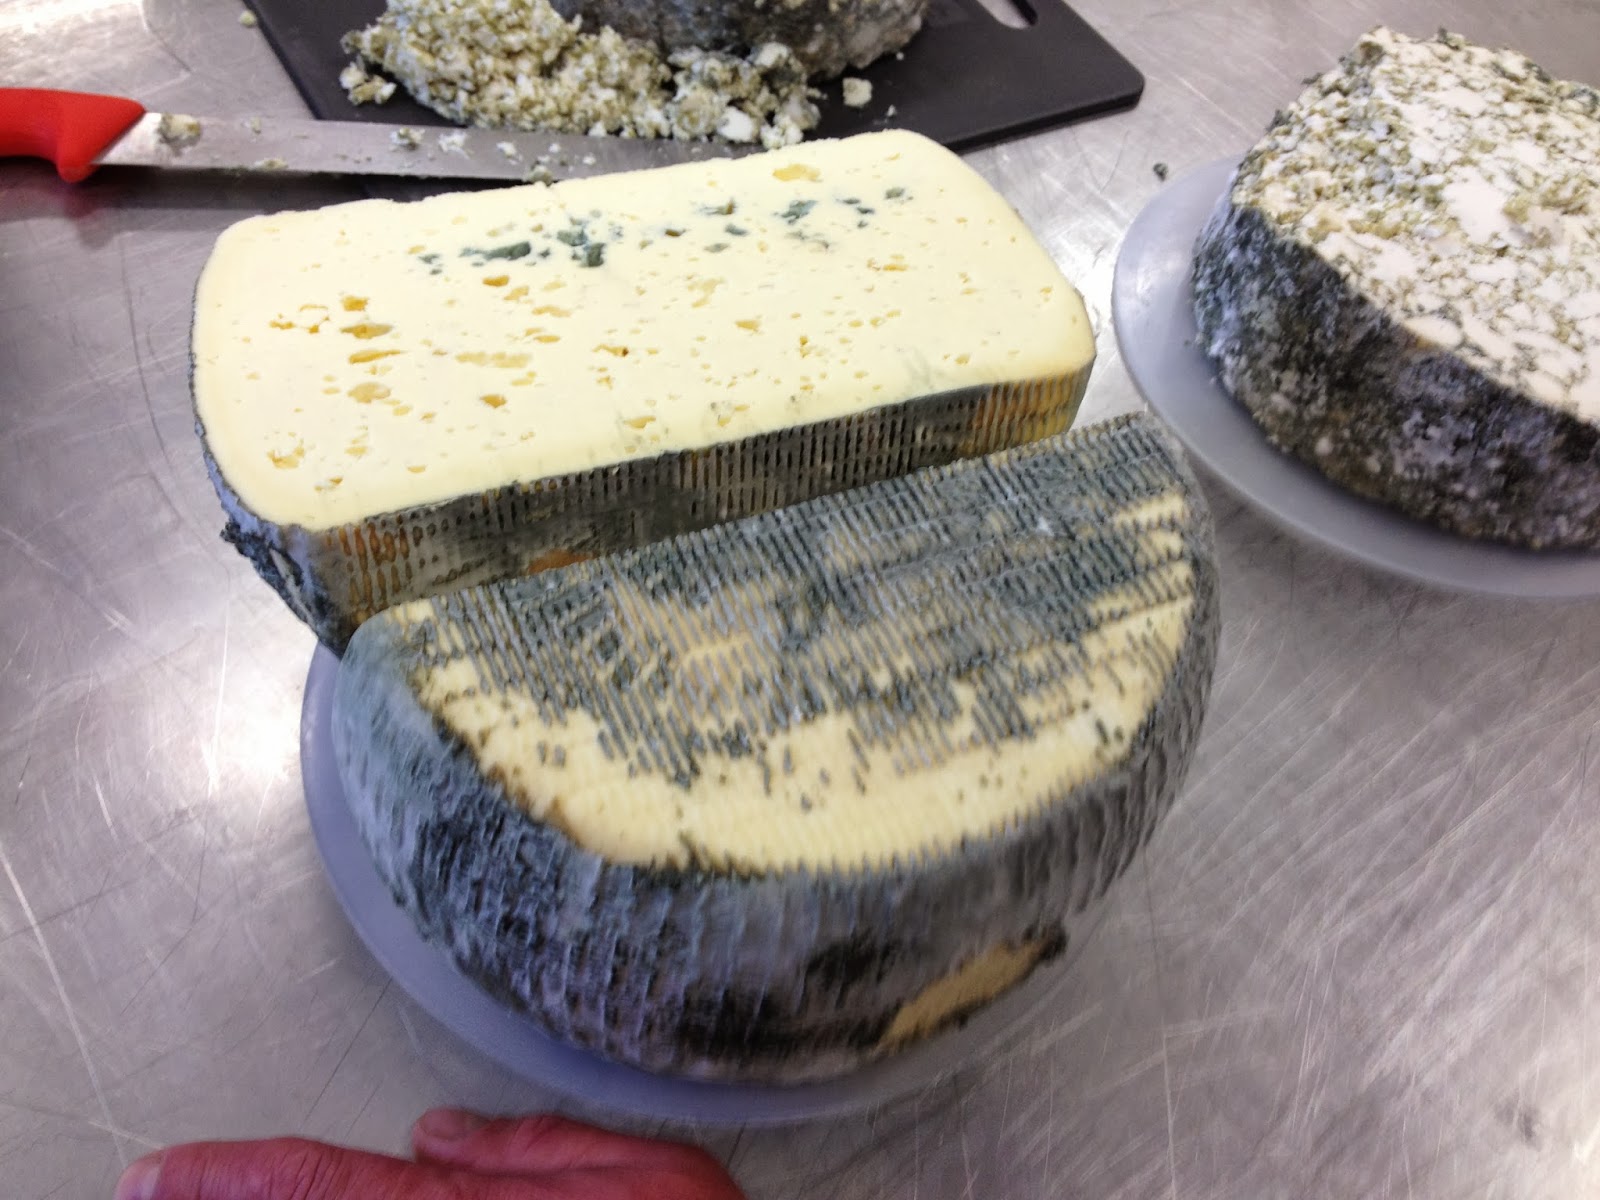
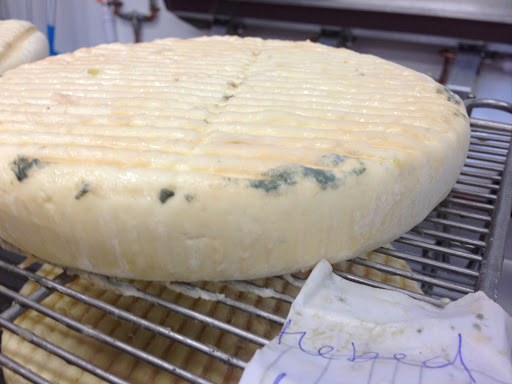
The goats milk Stichelton.  Well marbled as you can see.  Bit too marbled if truth be told.
Assessing all those cheeses did give valuable information.  Could we have pierced the cheeses more to allow better blueing (we pierced by hand of course because we hadn’t made very many cheeses), what was the effect of the fat content of the milk, the effect of salting and how much you really do need when you add blue mould into the mix.
And should I forget, we also got to visit Sticheltonproduction where Joe Schneider and his team,, particularly Ross were really helpful with their information and even allowed us to try ladling some curd.  It is tough work believe you me.  I am no stranger to lifting heavy things or working hard but the strain of lifting a full ladle of curd gives you arm-ache that lasts for weeks.  I know, I had it.
Another peculiarity is that, of course, you have to use a particular side of the body to ladle.  This could lead to an overdeveloped arm.
‘So how do you keep both arms equal.’ Someone asked Ross as we observed them ladling.
‘I try to vary it,’ he replied, ‘but I can’t vouch for what Joe does to keep his left arm in training…’
And on that note, I will leave you to ruminate on blue cheese.

The Taleggio Experiment

The decision to rent the School of Artisan Food was made, a recipe was researched, whilst attending a course there, I was able to work out what equipment we’d need and finally our dates rolled around.  Rose purchased containers, filled them with milk and sent them off with a refrigerated courier.  I drove myself off to the School of Artisan Food and got ready to receive milk.
I spent a day sanitising equipment and writing up a HACCP plan for our trial production and the following day was in bright and early for the milk to arrive.
Taleggio is an interesting make from my point of view, in that it uses thermophilic bacteria as a starter culture and yet doesn’t use the temperatures at which thermophilic bacteria tend to work best.  Like all washed rinds, the curd doesn’t want to acidify very much and it wants to retain a calcium rich, pliant structure.  The thermophilic bacteria therefore are used precisely because they will start working but as the temperature of the make cools off when the cheeses are in their moulds, they will stop going, the acidity will level out and won’t develop further.  This in theory and coupled with curd washing, should mean that the cheeses remain pliant with their moisture locked within the curd structure and soften when ripe to a gloriously oozing texture.  That is the theory anyway.
Taleggio photo courtesy of the thefiftybest.com
Within this, of course, there are many parameters to play with.  So many, in fact, that I wish we were in full production right now in some ways so I could be happily making cheese day after day, tinkering with a whole multitude of variables.  Would a degree or 2 more or less in terms of temperature affect the rennet set and the texture as the cheese matures?  How would the flavour and acidity be affected if I remove a bit less whey at curd washing?  What if I add in more starter cultures at stirring?  What if I stir for longer?  That’s not even getting started on how much starter we need to use to work with our milk and how much rennet will get me a 15 minute flocculation and 45 minute hardening time (which, I believe, is what I’m aiming for).
First challenge and challenge not yet overcome at that, is the quantity of starter.  There are no hard and fast rules for this of course because the amount of starter you use is entirely related to the numbers of lactic acid bacteria in your milk.  Thinking back to my Holker Farm days and remembering the drainage battles we had balancing acidity and calcium, I figured that if I wanted to have a slow acid development, even though I was using thermophilic bacteria this time rather than mesophilic ones, I should be using pretty small quantities of starter.  In retrospect, I’m not sure that was the case, but you live and learn.  I remembered that when I left Holker, we were using tiny quantities of bulk starter, having been advised to drop to around 0.025% and before that had been using still pretty tiny quantities at 0.05%.  I decided to start at the higher of these values, having made up a yoghurt culture in skimmed milk the night before and incubated it overnight.  Yoghurt cultures, for those who didn’t realise, are thermophilic bacteria.
Now, at this stage, the benefit of recording values of acidity began to hit home.  In all my time at Holker, we never recorded a pH.  The pH meter had broken before I arrived and they are very expensive bits of kit to replace.  We took titratable acidity of course but the TA of our starter cultures which I took every so often, are hard to correlate with that of this yoghurt because of the buffering factor.  Our starters at Holker were made up in sheeps milk, which is high in protein – it can be up to 3 times that of cows milk.  My yoghurt cultures were made up in UHT skimmed cows milk.  As you all no doubt remember from the pH and Titratable acidity post last autumn, protein captures Hydroxl ions (OH-) when you add the alkaline solution looking for a pink colour produced by its reaction with the indicator, phenolphthalein.  This distorts the correlation between acid and pH because it is non-uniform.  The more protein the milk has, the more Hydroxyl ions it can capture and the more Sodium Hydroxide needs to be added before a reaction with the indicator will register.  In other words the TA value will be higher in sheeps milk than in cows milk just down to the protein.  In fact, at Holker when we began making cows milk and sheeps milk cheese side by side, we noticed a huge difference when recording the TA at 24hours (or thereabouts) between the two.  Our sheeps milk St James regularly recorded 80-90 ’D while the cows milk Brother Davids struggled to reach 40’D.  You would think that the majority of the protein in the sheeps milk had been locked up in the curd by then but just as the milk is higher in protein, so is the whey and so the titratable acidities ended up being quite dramatically different.
Anyway, returning to the matter in hand and hope I didn’t lose too many non techno cheese geeks along the way.  There was no point, to my mind, trying to correlate vaguely remembered TA values of starter culture with a yoghurt I had just made as I didn’t have any of those values recorded for reference.  So I took a pH reading of the starter and was conscious it was more acidic than my notes from Ivan Larcher’s course suggested was ideal (pH 5 – to make sure you catch the bacteria while they are multiplying happily and before the lactic acid they have produced can denature them and kill them off), but otherwise didn’t have much to relate it to.
On the first trial, 0.05% in quantity was added to 50 litres milk, the milk was heated to 34’C, rennet added at the appropriate pH change and I filled my pot of water to look out for flocculation times.  The flocculation happened right on time, the hardening more or less followed the pattern it was supposed to.  I pre-cut, then cut to hazelnut size (more or less – it’s a bit hard to use a cutting harp designed for a big vat in a 50 litre tub), let if settle, took off the 25% whey, added back the appropriate quantity of water at 32C, added some starter back in for flavour and stirred.  The recipe was one I’d found online and frankly has already been adapted.  At the time, I queried curd washing with Ivan Larcher and he replied
‘Good luck settling the pH at 5.2 without it.’
Later on, I asked for clarification on quantities and adjusting those parameters only to be told that it’s an industrial technique and he didn’t recommend me doing it.  I have therefore stopped.
However I was doing so on this trial make, and at every stage, I was recording pH on the spreadsheet Ivan had emailed me after our Blue Cheese course so that it would track the pH curve.  Unfortunately my pH curve didn’t curve.  It was more of a wobbly straight line.   Short of leaving the whole thing for 24 hours to acidify on its own, there wasn’t much I could do but proceed, pre-draining the curd on a mat and then filling the moulds with the drained curd pieces and turning, turning, turning throughout the afternoon.
All looking quite convincing so far – unfortunately it’s all in the maturation.
They looked pretty convincingly like cheeses.  They were draining.  But who knows what was going on below the surface without much acidification.  The problem is, all sorts of other bacteria could be enjoying the quantities of lactose and developing to undesirable results.  Unfortunately despite doubling the starter cultures the following day, the same acidification pattern followed.  Evidently at Holker Farm the starter culture had very minimal effect and acidification was largely governed by the lactic acid bacteria naturally present in the sheep and cows milk.  Further unfortunately, I already knew from a lactofermentation we had done a week or so earlier when Rose drove up (bringing a bottle of milk with her) to SAF to meet Ivan and me after one of the days of the course had finished, that we didn’t have a lot of strong lactic acid bacteria in our milk at the moment and that other things tended to become dominant.  To say I was nervous of the test results we would get from milk and curd samples would be an understatement.
I left SAF; the samples headed to the lab; we waited for the results.  As I had feared, without enough lactic acid bacteria from the starter or naturally present in the milk itself, enteros and pseudomonas had had a field day.  Staph. aureus hadn’t done so badly either.
Not quite what I was hoping for but still looking relatively like cheeses
After a couple of weeks, I drove to SAF to collect the unfortunate cheeses.  I did not have high hopes to be honest, particularly as one of them had pancaked overnight and collapsed – a bit of a surprise for me and also for Lee Anna.
However, I had known, that I had more cheese than I was expecting, which I suspected meant they were too moist.  This raises the likelihood of crazy things happening during maturation.  What I didn’t know however until I began to think and mull it over was that those rather too healthy pseudomonas might also have played a part in this too.  Pseudomonas, as I had discovered thanks to the very knowledgeable Paul Thomas, are caseolytic (they eat casein).  Could that mean that they might increase the speed and amount of protein breakdown in our cheeses?  One quick email and a reply later and yes, by no means the only factor but, if there were large numbers of pseudomonas, then there was much more chance of pancaked gooey cheeses that fall apart.
All in all, I wasn’t sure what I would find at SAF but although one batch had fallen to pieces, the other did seem to be holding some shape and smelled convincingly washed rind.  Not the best behaved of washed rind, I’ll admit, but I’ve smelled worse in my time.  We tasted one of them and to my surprise there wasn’t a strongly bitter flavour that I was expecting due to the pseudomonas, in fact the predominant flavours were beery, yeasty and fruity with a hint of meaty and savoury in the background and perhaps just a touch of the bitterness on the rind but certainly not overpowering.
Now let’s be clear, it’s not the flavour profile I want but then again, the recipe didn’t work, so for it to have turned out to be not only edible but while a bit raucous, actually not too bad, was a definite bonus.  That said, a valuable lesson was learned for Cheese Trial no 2: use a hell of a lot more starter!

Cheesery on Wheels

Somewhere around February as we were delayed in our site planning permission by the Highways Agency and considering renting an industrial unit, Rose’s mother asked
‘Why don’t you just try and make a few cheeses?’
Although we had no site in which to make cheese, we both loved the idea and began to test out various options.
Option 1:  Use a catering kitchen on the estate
Option 2:   See if a friendly cheesemaker would like to rent us their space
And Option 3, which presented itself while booking in on a course for learning about Blue Cheese:
Rent the training dairy at the School of Artisan Food.
Option 1 was abondoned quite quickly as not only was the kitchen not available but we also had no maturing space for anything we made (although we did consider purchasing a few wine fridges for the purpose).
Option 2 was investigated but bringing non EHO approved milk into someone’s work space to make a completely different type of cheese which the cheesemaker had no HACCP for was a can of worms that the people we approached would rather wasn’t opened and, to be honest, that’s understandable.  Option 3 however had legs.
Enter Lee Anna Rennie Dairy co-cordinator for the School of Artisan Food, who loved the idea and researched us a price and set about working out what the School would need from us in order to make this idea reality.
At the same time, we also looked into the possibility of hiring the Little Cheesery, a mobile cheesemaking unit which has been developed by a company in Derby.  They actually specialise in stainless steel work and custom making as well as assembling food standard production lines.  The Little Cheesery is something they knocked together to show what they can do in terms of cheese equipment and it has proved really quite popular for demonstrations and fairs as well as for people like us who want a home for some trial batches.
A visit to both was necessary so off I drove to the School of Artisan Food for a look around and then a few days later off I drove again to Derby to look over the Little Cheesery.
It was a tough choice to make, actually, in the end.  The Little Cheesery is remarkably well equipped and fits a lot of stuff into a small space, actually rather more than we needed.  The dairy at the School of Artisan Food also has a lot of equipment, far more than we need, but of course they run professional cheesemaking courses covering every type of cheese from hard, mountain-style cheese to soft lactic cheese so diverse equipment is required.  It has many other attractions too, the possibility of a milk supply if we had wanted, their extensive research library, the waterbath for controlled lactofermentation tests and the cheese care services of Lee Anna as well.
The thing that really made the decision crystal clear in my mind, though, was just the fact it is a permanent building with its own functioning infrastructure.  The basic things like not having to plug a trailer into three phase electricity or connect up to a water supply etc are taken care of meaning that when it comes to the problems you have to troubleshoot (because let’s not be so naïve as to think there won’t be any) they are related to the milk, the make and the cheese and not fixing the electrics.
With any decision, you choose what problems you’d rather be dealing with.  We chose to focus on understanding the milk and the cheese.  I’m glad we did.